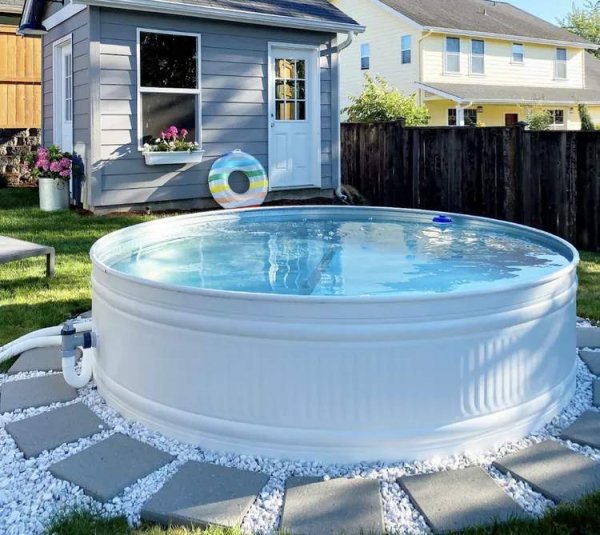
How to Build a Stock Tank Pool: Costs, Setup and Maintenance
A stock tank pool can be assembled in two to eight hours for roughly $500, according to a step-by-step guide for converting a galvanized or plastic stock tank into a small backyard pool. The project requires intermediate DIY skills, a drill, hole saw, tin snips, silicone gun, filter pump, hoses and fittings.

Choosing the Right Tank and Location
Stock tanks come in oval or circular shapes and in plastic or galvanized metal. Plastic is lighter and more corrosion-resistant, while metal resists sun degradation better. For a pool that allows an adult to stretch out, the guide recommends at least 8 feet in diameter; a depth of 26 to 28 inches keeps shoulders submerged while seated. Oval tanks suit one person stretching out, while circular tanks hold more people comfortably.
Placement matters because a filled tank cannot be moved. Water weighs 8.33 pounds per gallon, so a 300-gallon tank holds about 2,500 pounds of water. On an 8-by-3-foot footprint (24 square feet), that equals 104.2 pounds per square foot — far exceeding the roughly 20 pounds per square foot most decks are rated to support. The guide states never to put a stock tank pool on a deck or roof.

Installation Steps and Leak Testing
The ground must be level, with high spots dug out and low spots filled with dirt or gravel, then tamped to limit settling. Power comes from an exterior outlet via an extension cord routed to avoid tripping hazards. Before drilling, the tank should be filled with water to check for leaks at the seams; any leak should be sealed with silicone from the inside so water pressure presses the seal against the tank wall. Leaks plugged from outside will eventually fail, the guide notes.
Holes are drilled for a hose fitting or skimmer and a return line, both slightly below the chosen waterline. A hose fitting can substitute for a real skimmer in small tanks. Hose fittings are installed with a bead of silicone, and an all-in-one cartridge filter pump connects the skimmer side to the return. Hose clamps secure all connections.


Water Chemistry and Maintenance
After filling, the pump is started and all connections checked again under pressure. Chemical treatment begins with a baseline test, since some tank finishes affect pH. Small amounts of pool shock or chlorine tablets are added until chlorine reads between 3 and 4, with pH, alkalinity and calcium adjusted similarly. The guide advises checking chemistry at least weekly and running the filter pump at least eight hours daily, especially in sunny locations. Regular leak inspections limit corrosion. For winter, the pump is disconnected and stored indoors, the pool drained and moved to a shed or under a deck.


According to the source, stock tank pools cost between $100 and $1,000 depending on tank and pump size, with $500 a typical figure excluding ongoing maintenance. The guide says they can last for years with proper setup and care, and may help homeowners decide whether full pool ownership suits them.
How to Build a Stock Tank Pool: Costs, Setup and Maintenance
Stock tank pools offer an affordable alternative to traditional backyard pools, with setups typically costing around $500 and taking two to eight hours to complete. The process requires leveling ground, drilling holes for a filter pump and fittings, sealing leaks, and balancing pool chemicals.
Editorial Notes